


Total Project
Timeline
Months
Final Sale
Price
Dollars
Renovation
Budget
Dollars
Return on
Investment
%
Return
Net
Profit
Dollars
Major milestone markers:
Step One: Property Procurement
Finding the Right Investment
Every successful project begins with a solid investment strategy.
Our client’s goal was clear:
Target homes in a specific region with three or more bedrooms, focusing on those that either required forced value-adds—like adding a bathroom—or those that were outdated and could be modernized for a higher resale value.
These homes fit their criteria and were perfect for a fix-and-flip strategy.
Defining the Numbers: ROI Formula
To help our client make an informed decision, we focused on three key factors:
- Purchase price – Could the property be purchased at a favorable price?
- Renovation cost – What would it take to bring the property up to modern standards?
- After-Repair Value (ARV) – Would the final sale justify the investment?
We used our sister company, Oneway Investments, to run the comparables (comps) and help locate suitable properties, while Oneway Renovation provided the renovation cost breakdown, ensuring we stayed on budget and timeline.
Evaluating the Potential: Walkthrough and Value Add
Once we had a shortlist of properties, it was time to walk the house and assess its true potential.
With Plumbrook, we saw several major value-add opportunities:
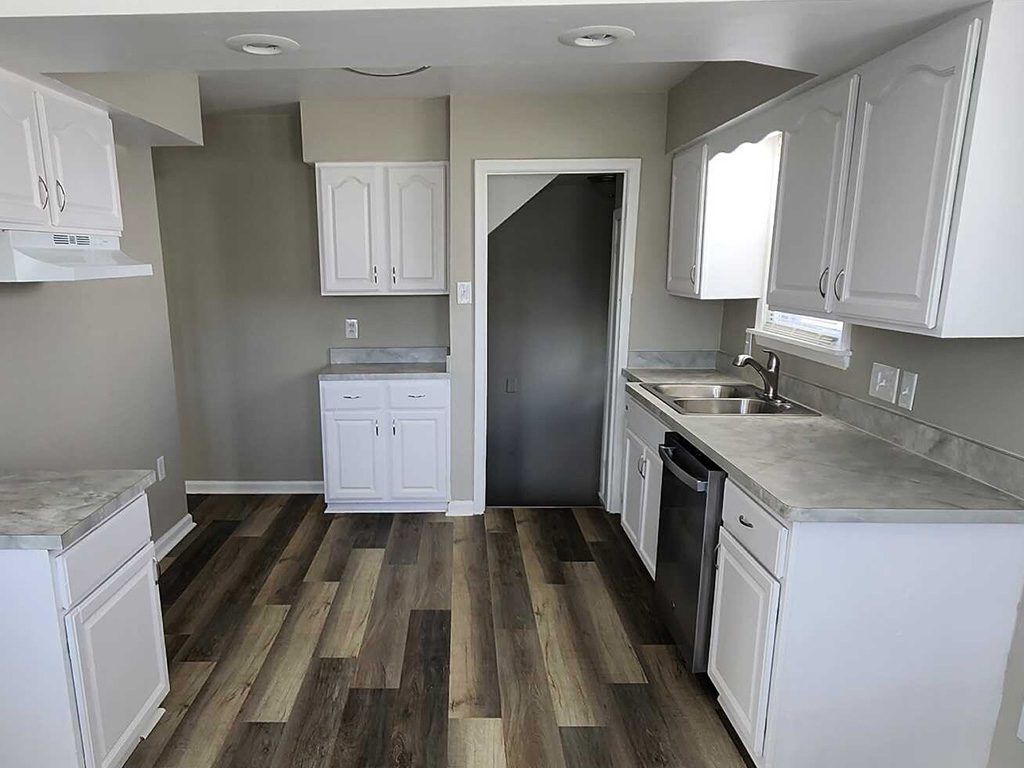
- Expanding the kitchen – Adding square footage and modern features to improve functionality and appeal.
- Finishing the basement – Adding an egress window and a full bathroom to maximize livable space and safety.
- Adding a bathroom upstairs – This was a significant update, given the house originally had no bathroom on the second floor.
- Adding a first-floor bedroom – Increasing the home’s versatility and appeal to a broader range of buyers.
- Opening up the dining room walls – Creating a more open-concept flow to modernize the layout.

Running the Numbers:
The Big Picture
Once we saw the potential, we ran the numbers. The purchase price of $182.5K was reasonable, and we estimated $48K-$50K for the renovation costs. With the projected ARV coming in at $290K, we could confidently move forward with the deal, factoring in closing costs and short-term utility expenses.
Fast-Tracking the Offer:
Timing is Key
In today’s competitive real estate market, speed is essential. We quickly presented a rough cost estimate to the client, giving them the information needed to make a quick decision. Within 24 hours, the offer was placed.
Step Two: Planning and Preparation
With the property secured, it was time to refine the plan and set the foundation for a smooth renovation. This phase involved finalizing the scope of work, ensuring proper coverage, and preparing for execution.

Scope Refinement & Contracts
We established a detailed, line-by-line scope of work and set a formal contract, ensuring insurance coverage was in place for the project.
Maximizing ROI with Minimal Risk – Since this was our first flip with this client, we carefully selected the highest-impact upgrades with the least risk. We opted for an upstairs bathroom, an additional bedroom, and floor re-leveling, while postponing the more complex egress window, basement bathroom, and full kitchen remodel.
Expert Consultations & Permits
Before breaking ground, we brought in trade experts to validate the feasibility of the upgrades. Once plans were in place, we pulled the necessary permits—cutting corners is never an option, and we wanted the inspectors on our side from the start.
Remote Project Tracking
One of the clients lived in California, so we provided them with a personalized web page to track daily progress. This included live project updates, daily logs, updated photos, schedules, and direct communication, eliminating the need for constant meetings.
Material & Design Selections
While demolition got underway, we worked closely with the client to finalize materials, colors, and finishes, ensuring every detail aligned with the project’s goals.
Timeline & Holiday Adjustments
Factoring in permits and the holiday season, we set a realistic timeline of 10 weeks for project completion.
With the plan locked in, permits approved, and materials chosen, the next step was turning vision into reality – moving into the execution phase of the renovation.
Step Three: Project Phases
With planning complete, it was time for the most crucial part—the work itself. At this stage, the owners had little involvement beyond approving any necessary changes. Payments were structured in installments, released at key progress points, ensuring financial transparency and accountability. However, these particular owners wanted to meet once a week online in addition to their project tracking access. Since they were learning the process for future investments, we were happy to accommodate this level of involvement.

Demolition
The fun part! We started by removing outdated materials, opening up walls, and prepping the space for structural changes.

Framing & Inspection
Once the demolition was complete, framing was built for the new bathroom and bedroom, followed by a framing inspection.

Rough Electrical, Mechanical, & Plumbing
Electrical, HVAC, and plumbing were completed simultaneously to maximize efficiency.

Subfloor & Prep Work
While waiting on inspections, we laid new subfloor and prepped the space for the next phase. During this process, we discovered that some walls and stairs were not properly supported by joists or beams. To resolve this, we installed new steel jack posts in the basement and added a new floor joist, ensuring the first floor was structurally sound. This also required resurfacing the entire first floor to make it level.

Drywall, Basement Updates, & Kitchen Cabinet Refinishing
With approvals in hand, drywall installation began alongside basement finishing work and kitchen cabinet refinishing. However, since the entire house was built with plaster and lathe, achieving a clean finish required additional planning. Rather than removing all the existing walls, we opted to install 1/4″ drywall overlays to create a smooth, professional look.

Doors & Final Fixtures
Interior doors were hung, and final electrical and plumbing fixtures were installed.

Painting & Flooring
Walls were painted, and both carpet and vinyl plank flooring were installed throughout the home.


With every step executed efficiently and quality-checked, the renovation was complete.
Now, it was time to move on to Polishing and Refinement, ensuring every detail was market-ready.
Step Four: Polishing and Refinement
Final Inspections
Another round of inspections everything was up to code.
Final Walkthrough & Punch List
Before presenting the home to the client, we conducted our own in-house walkthrough, identifying any defects, mistakes, or missed details. Any necessary corrections were added to a punch list and addressed by the crew.
Client Walkthrough & Adjustments
After our review, the client was invited to do a walkthrough, sharing their observations or concerns. Any additional corrections they requested were completed promptly.
Final Details & Cleaning
Blinds, touch-up paint, and other finishing touches were completed before the property received a deep clean in preparation for listing.
Scope Reconciliation & Budget Review
We compared the completed work to the original scope, ensuring that any work that was adjusted, omitted, or completed under budget was reflected in the final billing. If an item was budgeted but not needed, we didn’t charge for it.
With every detail addressed, the property was officially market-ready and ready for listing.


Step Five: Profit and Outcomes
Final Sale and Closing Timeline
Months
From purchase to closing, the total project duration was just under four months.
Final Sale Price
Dollars
The home sold for $290K, aligning with our initial ARV projections. The listing received strong interest and multiple offers within the first weekend after an open house, hosted by our sister company, Oneway Investments, which also provided professional photos and managed the closing process.
Renovation Costs
Dollars
The total renovation budget remained under $50K, demonstrating our ability to maximize value while keeping costs controlled.
Investment Return
Return
While we respect client confidentiality, the project yielded an ROI greater than 15% and a net return exceeding $35K—a strong result in under four months.
Scope Reconciliation & Budget Review
%
Dollars
We compared the completed work to the original scope, ensuring that any work that was adjusted, omitted, or completed under budget was reflected in the final billing. If an item was budgeted but not needed, we didn’t charge for it.
With every detail addressed, the property was officially market-ready and ready for listing.
Additional Insights
Every renovation project comes with its own challenges and opportunities. The success of the Plumbrook property reinforced the importance of strategic planning, flexibility, and a well-coordinated team. By making smart renovation choices and staying proactive in problem-solving, we were able to deliver a high-quality home while exceeding investment expectations.
Key Takeaways
Efficient Execution
From purchase to closing in under four months, proving that a well-planned flip can be executed quickly and profitably.
Strategic Budgeting
By choosing the right improvements and managing costs effectively, we kept renovations under $50K while significantly increasing the home’s value.
Seamless Client Experience
With remote project tracking and structured approvals, our out-of-state client was able to stay informed without unnecessary hassle.
Market Alignment
Pricing strategy and renovations aligned with market demand, resulting in a strong resale price and smooth closing process.
With this project successfully completed, we look forward to applying the same strategic approach to future investments, ensuring continued success for our clients.
Are you ready to take on your next investment project?
Whether you’re looking for expert renovation guidance, strategic investment insights, or a team that can bring your vision to life, we’re here to help. Let’s turn your next property into the next success story.
All Case Studies
Firwood Case Study – Full Turnover Renovation
Discover how we transformed a severely damaged post-eviction property into a code-compliant, market-ready rental in just 4 weeks. This Eastpointe single-family home was infested with flies, filled with trash, and at risk of city fines when a property management company called us for help. Our comprehensive renovation included emergency trash-out and sanitation, new waterproof vinyl plank flooring, bathroom renovations, kitchen upgrades, and complete interior repainting across all 7 rooms. From unsanitary mess to fully revitalized rental, we handled everything in-house with no extra calls, no fines, and no failed inspections. Whether you manage one property or hundreds, see how our efficient turnover renovation process eliminates surprises and turns problem properties into profitable ones.

Plumbrook Property: A Strategic Fix-and-Flip Success
Discover how our team transformed an outdated property into a profitable investment in just 4 months. This fix-and-flip project delivered a 15+% ROI and over $35K in net profit with a renovation budget of $50K. Our strategic value-adding renovations included expanding the kitchen, adding an upstairs bathroom, creating a first-floor bedroom, and opening up the dining room for a modern open-concept flow. With efficient execution, strategic budgeting, and seamless project management for our out-of-state client, we turned a $182.5K purchase into a $290K sale. Ready to turn your next property into a success story? Learn how our proven approach can maximize your investment returns.